Navigating the serverless landscape requires precision, and a key aspect of this involves mastering custom domains for your APIs. Instead of relying on default, often cryptic, API endpoint URLs, custom domains offer branding, enhanced user experience, and improved security. This discussion meticulously examines the intricacies of integrating custom domains with serverless architectures, moving beyond the surface to provide a deep understanding of the underlying principles and practical implementation strategies.
The architectural shift towards serverless computing presents unique challenges and opportunities. While serverless APIs offer scalability, cost-effectiveness, and reduced operational overhead, they introduce complexities when it comes to domain management. This guide provides a detailed exploration of the process, from domain name selection and DNS configuration to platform-specific setups within AWS API Gateway, Google Cloud Run, and Azure API Management.
Furthermore, it addresses the critical role of SSL/TLS certificates, troubleshooting common issues, and automating the entire setup process, equipping developers with the knowledge to effectively manage their serverless API infrastructure.
Introduction to Custom Domains for Serverless APIs
Serverless APIs, while offering significant advantages in scalability and cost-effectiveness, often present a challenge in terms of user experience and brand identity due to their default endpoint URLs. These URLs, typically auto-generated by the cloud provider, can be lengthy, complex, and lack the professional touch of a custom domain. Employing custom domains is crucial for a polished and user-friendly API experience, reflecting the brand’s identity and enhancing user trust.Custom domains provide a crucial layer of control and professionalism for serverless API deployments.
They offer a more recognizable and memorable address for the API, improving user experience and brand perception. This approach also provides greater flexibility in managing the API’s lifecycle, including updates, migrations, and potential provider changes, without impacting the user-facing URL.
Benefits of Custom Domains over Default API Endpoints
Using a custom domain presents several key advantages over relying on the default API endpoint URLs provided by serverless platforms. These benefits extend beyond mere aesthetics and contribute significantly to the overall usability, security, and maintainability of the API.
- Enhanced Brand Identity and User Experience: A custom domain directly reflects the brand, fostering trust and recognition among users. Instead of a generic, provider-specific URL, users interact with an address that aligns with the brand’s established identity, leading to a more cohesive and professional experience. This is particularly important for public-facing APIs.
- Improved Memorability and Ease of Use: Custom domains are significantly easier to remember and share than the often complex and lengthy default URLs. This ease of access encourages wider adoption and easier integration by third-party developers or users.
- Increased Flexibility and Control: Utilizing a custom domain provides greater flexibility in managing the API’s lifecycle. Changes to the underlying infrastructure, such as platform migrations or API updates, can be implemented without disrupting the user-facing URL. This abstraction allows for seamless transitions and reduces the risk of breaking existing integrations.
- Enhanced Security and Trust: Custom domains can leverage SSL/TLS certificates, ensuring secure communication and building user trust. The presence of a recognizable domain name further validates the API’s authenticity, reducing the risk of phishing attacks or other security threats.
- Benefits: While the direct impact on search engine optimization () may be limited, a custom domain associated with an API can indirectly improve the brand’s online presence. A strong brand identity, reinforced by a consistent domain, contributes to overall online visibility and credibility.
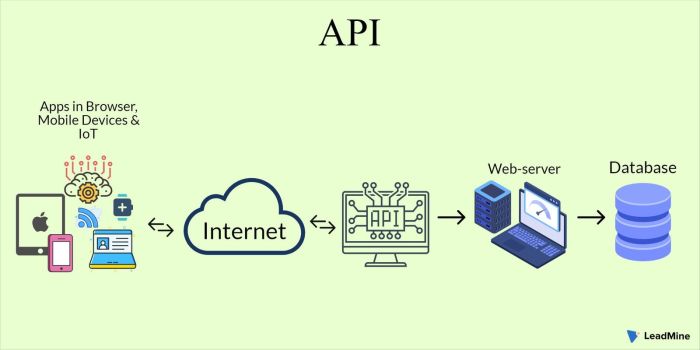
Overview of Serverless APIs and Their Architecture
Serverless APIs represent a significant shift in the way applications are developed and deployed, abstracting away the complexities of server management and infrastructure provisioning. Understanding their architecture is essential for effectively implementing custom domains.Serverless APIs are built upon the concept of Functions-as-a-Service (FaaS), where individual functions are executed in response to events, such as HTTP requests. These functions are typically stateless and designed to perform specific tasks.
The core components of a serverless API architecture include:
- API Gateway: The entry point for all API requests. It handles routing, authentication, authorization, and rate limiting. Popular examples include AWS API Gateway, Azure API Management, and Google Cloud API Gateway.
- Functions (Lambdas, Cloud Functions, etc.): The individual units of code that execute the API logic. They are triggered by events and process requests. These functions are often written in languages like Python, Node.js, or Java.
- Storage and Databases: Serverless APIs often interact with various storage services, such as object storage (e.g., AWS S3), databases (e.g., AWS DynamoDB, Azure Cosmos DB, Google Cloud Firestore), and caching layers (e.g., AWS ElastiCache, Azure Cache for Redis).
- Event Triggers: Events such as HTTP requests, database updates, or scheduled tasks trigger the execution of functions. These triggers are a fundamental part of the serverless architecture.
- Monitoring and Logging: Serverless platforms provide tools for monitoring API performance, logging events, and debugging issues. These tools are crucial for maintaining and optimizing serverless APIs.
The interaction flow in a typical serverless API is as follows: a user sends an HTTP request to the API Gateway, which routes the request to the appropriate function based on the configured routing rules. The function processes the request, interacts with storage services if necessary, and returns a response to the API Gateway, which then sends it back to the user.
Common Challenges in Implementing Custom Domains
Implementing custom domains for serverless APIs introduces several challenges that developers must address to ensure a smooth and successful deployment. These challenges often involve DNS configuration, SSL/TLS certificate management, and platform-specific intricacies.
- DNS Configuration and Propagation: Configuring the DNS records to point the custom domain to the API Gateway is a critical step. This involves creating CNAME or A records, depending on the platform’s requirements. DNS propagation, the process by which these changes are distributed across the internet, can take time, leading to delays in the API’s availability.
- SSL/TLS Certificate Management: Securing the custom domain with an SSL/TLS certificate is essential for encrypting communication and building user trust. Obtaining, configuring, and renewing these certificates can be complex, requiring careful attention to expiration dates and automated renewal processes.
- Platform-Specific Configuration: Each serverless platform (AWS, Azure, Google Cloud, etc.) has its own specific procedures and requirements for implementing custom domains. Developers must understand these nuances to correctly configure the API Gateway, manage certificates, and handle routing.
- Cost Considerations: Custom domains and SSL/TLS certificates can incur additional costs. These expenses should be factored into the overall API budget.
- Complexity of Setup and Maintenance: The initial setup of a custom domain can be complex, involving multiple steps and configuration settings. Ongoing maintenance, including certificate renewals and DNS updates, adds to the operational overhead.
Addressing these challenges requires careful planning, understanding of the chosen platform, and attention to detail. Automation tools and infrastructure-as-code approaches can help streamline the implementation process and minimize the risk of errors.
Choosing a Domain Name and Registrar
Selecting a suitable domain name and registrar is a critical step in deploying a serverless API with a custom domain. The domain name serves as the public face of the API, directly impacting user perception and brand recognition. Choosing a reputable registrar ensures reliable domain management and security. This section delves into the factors influencing domain name selection, compares different registrars, and Artikels the steps involved in acquiring and maintaining a domain.
Factors Influencing Domain Name Selection
The choice of a domain name significantly impacts the API’s identity and discoverability. Several factors must be considered to ensure the chosen name is effective and aligns with the API’s purpose.
- Relevance to API Functionality: The domain name should clearly indicate the API’s core function. For instance, an API providing weather data might benefit from a domain name incorporating terms like “weather,” “forecast,” or “climate.” This aids user understanding and improves search engine optimization ().
- Memorability and Brandability: A memorable domain name is easier for users to recall and share. Consider using a name that is concise, easy to spell, and pronounce. Brandability involves creating a domain name that aligns with the overall brand identity and helps build a recognizable brand presence.
- Availability and Extension Considerations: Check for the availability of the desired domain name across different top-level domains (TLDs) such as .com, .net, and .org. While .com is the most common, the choice of TLD should align with the API’s purpose and target audience. Consider regional TLDs if targeting a specific geographic area.
- Length and Simplicity: Shorter domain names are generally easier to remember and type. Avoid complex names with hyphens or numbers, as they can be prone to errors and make the domain less user-friendly.
- Considerations: While not the primary factor, incorporating relevant s into the domain name can improve . This can help users find the API through search engines. However, prioritize readability and brandability over stuffing.
Comparison of Domain Registrars
Numerous domain registrars offer domain registration services, each with varying pricing, features, and user interfaces. A careful comparison is essential to select a registrar that meets specific requirements.
| Registrar | Pricing (Example: .com domain) | Features | Ease of Use |
|---|---|---|---|
| GoDaddy | Variable, often with promotional pricing for the first year, then higher renewal rates. | Domain privacy, email hosting, website builder, SSL certificates. | Generally user-friendly, with a large user base and extensive support resources. |
| Namecheap | Competitive pricing, often lower than GoDaddy, with transparent renewal rates. | Free Whois privacy, domain name security features, and email hosting. | User-friendly interface, known for its customer support and focus on security. |
| Google Domains | Competitive pricing, transparent renewal rates, and includes Whois privacy. | Simple and clean interface, integration with Google services, and strong security features. | Very easy to use, with a streamlined interface and clear instructions. |
| Cloudflare | Offers domain registration at cost, passing through wholesale prices with no markup. | Includes DNS management, SSL/TLS certificates, and other security features. | User-friendly interface, with a focus on performance and security. |
The pricing listed above is an example and can vary based on promotions, domain extensions, and the specific features included. Always compare pricing, renewal fees, and included features before making a decision. For example, Cloudflare offers domain registration at cost, meaning they do not add a markup to the wholesale price, which can result in significant savings compared to other registrars.
The choice of a registrar depends on individual needs and priorities. For instance, if ease of use is a primary concern, Google Domains might be a good option. If the lowest possible cost is the priority, Cloudflare is an attractive choice. For comprehensive features and a large user base, GoDaddy is often considered. Namecheap provides a good balance of features, price, and security.
Steps Involved in Purchasing and Managing a Domain Name
Acquiring and managing a domain name involves several steps, from searching for availability to configuring DNS settings.
- Domain Name Search and Registration: Use the registrar’s website to search for the desired domain name. If the name is available, select the desired TLD and proceed with the registration process. This typically involves providing contact information and payment details.
- Account Creation and Verification: Create an account with the chosen registrar and verify the provided contact information. This is often done through email verification.
- Domain Configuration: After registration, configure the domain settings, including contact information, privacy settings (e.g., Whois privacy), and DNS records. DNS records are crucial for pointing the domain to the serverless API.
- DNS Configuration for Serverless APIs: Configure the DNS records (e.g., A records or CNAME records) to point the domain to the serverless API’s endpoint. This is usually done through the registrar’s DNS management tools or by using a third-party DNS provider.
- Renewal and Management: Regularly renew the domain name before its expiration date to avoid losing ownership. Manage the domain settings, including contact information, DNS records, and security settings, as needed. Some registrars offer auto-renewal options.
DNS Configuration for Custom Domains
Configuring DNS records is a critical step in directing traffic from your custom domain to your serverless API. This process involves updating the domain’s DNS settings with records that map your domain name to the IP addresses or service endpoints provided by your API provider. The specific configuration steps and record types vary depending on your domain registrar and the serverless platform you are using.
Understanding the role of DNS records and how to configure them is fundamental to ensuring your API is accessible via your custom domain.
The Role of DNS Records in Serverless API Connectivity
DNS records are the instructions that tell the internet where to find your serverless API. They translate human-readable domain names (like `api.example.com`) into the IP addresses or service endpoints that computers use to locate and communicate with your API. Without properly configured DNS records, users will not be able to access your API through your custom domain. Several record types are commonly used for this purpose, each serving a specific function.
Configuring DNS Settings with Different Domain Registrars
The process of configuring DNS settings differs slightly depending on your domain registrar’s interface. However, the underlying principles remain the same. You will need to access your domain’s DNS management panel, which is usually found in your registrar’s account settings. From there, you can add, edit, or delete DNS records. The exact steps vary, but typically involve entering the record type, the host (or subdomain), the value (the IP address or service endpoint), and the TTL (Time To Live, which specifies how long the record should be cached).
Common DNS Record Types and Their Uses
Several DNS record types are used to point a domain to a serverless API. The most common ones are A records, CNAME records, and sometimes ALIAS or ANAME records. Understanding the function of each record type is essential for proper configuration.
| Record Type | Use | Example Configuration |
|---|---|---|
| A (Address) Record | Maps a domain name or subdomain directly to an IPv4 address. This is a direct mapping from a domain to a specific IP address. If the underlying IP address of the API endpoint changes, the A record needs to be updated. |
|
| CNAME (Canonical Name) Record | Creates an alias from one domain name to another. This is useful when your API provider uses a different domain name for its service endpoint. A CNAME record points a subdomain (e.g., api.example.com) to a canonical domain name (e.g., your-api-endpoint.amazonaws.com). The advantage is that if the IP address of the canonical name changes, the CNAME record doesn’t need to be updated. The disadvantage is that it can’t be used at the root domain (@ or example.com). |
|
| ALIAS/ANAME Record | Similar to a CNAME record, but it is specifically designed to work at the root domain (@ or example.com). Some DNS providers (like Amazon Route 53) offer ALIAS or ANAME records that can map the root domain directly to a service endpoint, such as an API Gateway or a load balancer. This simplifies the configuration for the root domain, which otherwise requires an A record with an IP address. This functionality is not universally supported by all DNS providers. |
|
Setting up Custom Domains with AWS API Gateway
Configuring custom domains within AWS API Gateway is a critical step for presenting serverless APIs with a professional and recognizable identity. This process involves several interconnected steps, ensuring that your API is accessible through your chosen domain name and secured with an SSL/TLS certificate. Properly configuring a custom domain enhances user experience and builds trust by associating your API with a branded URL.
Configuring a Custom Domain in AWS API Gateway: Steps
The following steps Artikel the process for setting up a custom domain in AWS API Gateway. Each step is crucial for ensuring proper configuration and functionality.
- Create a Custom Domain Name: In the AWS API Gateway console, navigate to “Custom domain names” and create a new domain. Provide your desired domain name (e.g., api.example.com). API Gateway handles the domain configuration, and you’ll receive a generated regional domain name.
- Configure Base Path Mappings: Define the base path mappings to connect your domain name to your API stages. Specify the API and the stage you want to map to the custom domain. This step routes traffic from your custom domain to the correct API and its associated deployment stage.
- Obtain and Import an SSL/TLS Certificate: You must have an SSL/TLS certificate for your custom domain. You can either request a certificate from AWS Certificate Manager (ACM) or import a certificate obtained from a third-party provider. Importing is necessary if you didn’t obtain the certificate from ACM.
- Update DNS Records: After creating the custom domain, API Gateway provides you with a target domain name (a CloudFront distribution). You must update your DNS records with your domain registrar to point your custom domain to this target domain name. This is typically done by creating a CNAME record.
- Test the Custom Domain: After configuring DNS records, test your custom domain to ensure it resolves correctly and that your API is accessible through the new domain. Use tools like `curl` or a web browser to make requests to your custom domain.
Creating a Custom Domain: Detailed Example
The following example demonstrates the process of creating a custom domain in AWS API Gateway, illustrating the specific actions and configurations required.
Scenario: Configure a custom domain, `api.myexample.com`, for an API deployed in the `prod` stage.
- Create Custom Domain: In the API Gateway console, create a new custom domain. Enter `api.myexample.com` as the domain name. API Gateway will generate a regional domain name (e.g., `abcdefg1234.cloudfront.net`).
- Import or Request SSL/TLS Certificate:
- Using ACM (Recommended): Request a certificate for `api.myexample.com` and `*.myexample.com` (for wildcard support) in ACM. This automatically validates the certificate using DNS or email validation, which is a best practice.
- Importing a Certificate: If you already have a certificate, upload the certificate, private key, and certificate chain. Ensure the certificate matches the domain name.
- Configure Base Path Mapping:
- Select the created custom domain.
- Click “Configure API mappings.”
- Choose the API you want to associate with the domain.
- Select the `prod` stage.
- Set the base path to `/`.
- Save the mapping.
- Update DNS Records:
- Obtain the target domain name provided by API Gateway for your custom domain (e.g., `abcdefg1234.cloudfront.net`).
- In your DNS provider’s console, create a CNAME record:
- Name/Host: `api.myexample.com`
- Value/Target: `abcdefg1234.cloudfront.net`
- TTL: (Choose an appropriate TTL value, such as 300 seconds or less to allow for faster propagation)
- Test the Configuration:
- After DNS propagation (which may take a few minutes), test the API using `curl`: `curl -v https://api.myexample.com/your-api-endpoint`
- Verify that the API returns the expected response and that the connection is secured (HTTPS).
Importing an SSL/TLS Certificate for Secure Communication
Securing your custom domain with an SSL/TLS certificate is essential for protecting data transmitted between clients and your API. This involves importing a certificate into AWS API Gateway. The process varies slightly depending on where the certificate originates.
- Obtain the Certificate: The certificate must be in a supported format (PEM format is the most common). This includes the certificate itself, the private key, and the certificate chain (if applicable). Certificates can be purchased from various certificate authorities (CAs).
- Prepare the Certificate: Ensure the private key is not password-protected, as API Gateway cannot process password-protected keys. If the certificate chain is not already in the same file as the certificate, combine them.
- Import the Certificate in API Gateway:
- Navigate to the “Custom domain names” section in the API Gateway console.
- Select the custom domain you created.
- Choose “Import certificate.”
- Paste the certificate content, private key, and certificate chain (if separate) into the respective fields.
- Save the changes. API Gateway will validate the certificate and configure it for your custom domain.
- Verify the Certificate: After importing, verify that the certificate is correctly associated with your custom domain. You can test this by making an HTTPS request to your custom domain. The browser should indicate a secure connection, confirming that the certificate is correctly installed. Tools like OpenSSL can be used to verify the certificate details and its chain.
Setting up Custom Domains with Google Cloud Run

Setting up a custom domain for a service deployed on Google Cloud Run involves several steps, from configuring DNS records to managing SSL/TLS certificates. This process allows users to access Cloud Run services using a custom domain name, enhancing brand identity and user experience. The following sections detail the necessary procedures and best practices.
Process of Setting up a Custom Domain for Google Cloud Run
Configuring a custom domain with Google Cloud Run involves several distinct steps. The core components include verifying domain ownership, configuring DNS records, and deploying the service with the custom domain settings. These actions enable external traffic routing to the Cloud Run service through the specified domain.The process begins with verifying ownership of the domain within Google Cloud Console. This is often achieved through methods such as uploading a verification file to the domain’s root directory or adding a specific TXT record to the DNS settings.
Following verification, the user can proceed to configure DNS records. These records typically involve creating A or AAAA records that point to the IP addresses provided by Google Cloud Run or, alternatively, setting up a CNAME record that redirects traffic to a Google-managed domain. The final step is deploying the Cloud Run service with the specified custom domain, which enables the service to receive traffic from the custom domain.
Configuring SSL/TLS Certificates for Google Cloud Run
Secure Sockets Layer/Transport Layer Security (SSL/TLS) certificates are essential for encrypting communication between a user’s browser and a Cloud Run service accessed via a custom domain. Google Cloud Run provides several options for managing SSL/TLS certificates, including automated certificate management through Google-managed certificates and the ability to upload and manage custom certificates.When using Google-managed certificates, Google automatically provisions and manages the certificates, handling renewals and ensuring that the certificates remain valid.
This option simplifies the process, removing the need for manual certificate management. The alternative involves uploading and managing custom certificates. This approach offers greater control over the certificate, allowing users to use certificates from their preferred Certificate Authorities (CAs). This method necessitates that users upload the certificate and its private key to Google Cloud and configure the custom domain to use the uploaded certificate.
Google Cloud Run then utilizes these certificates to secure the traffic.
Best Practices for Google Cloud Run Custom Domain Configuration
Adhering to best practices ensures a secure, efficient, and reliable custom domain configuration for Google Cloud Run services. These practices cover various aspects, from DNS configuration to certificate management and service deployment.
- Domain Verification: Always verify domain ownership using Google Cloud Console’s recommended methods. This step is crucial for security and ensures that only authorized users can configure custom domains for their Cloud Run services.
- DNS Record Configuration: Configure DNS records (A, AAAA, or CNAME) correctly to point to the Cloud Run service. Double-check the accuracy of the records to prevent routing issues and ensure the custom domain resolves to the correct service.
- Certificate Management: Choose an appropriate certificate management strategy. Google-managed certificates simplify management, while custom certificates provide greater control. Regularly monitor certificate expiration dates, especially for custom certificates, to prevent service interruptions.
- DNS Propagation Time: Allow sufficient time for DNS changes to propagate across the internet. DNS propagation can take up to 48 hours, although it often completes much faster. Monitor DNS propagation status using online tools to avoid premature testing.
- Service Deployment: Deploy the Cloud Run service with the custom domain configured. After successful deployment, test the service using the custom domain to verify that it is accessible and that the SSL/TLS configuration is working correctly.
- Monitoring and Alerting: Implement monitoring and alerting for the Cloud Run service and the custom domain. Monitor traffic, error rates, and latency to identify and resolve issues promptly. Set up alerts for certificate expiration and DNS configuration changes to proactively address potential problems.
- Security Considerations: Employ HTTPS for all traffic to ensure secure communication. Regularly review and update security configurations, including TLS versions and ciphers, to maintain a secure environment.
- Regular Audits: Conduct periodic audits of the custom domain configuration, DNS settings, and certificate management. This helps to identify and address any potential security vulnerabilities or configuration errors.
Setting up Custom Domains with Azure API Management
Setting up custom domains within Azure API Management (APIM) is a critical step in establishing a professional and recognizable online presence for your APIs. This process allows you to replace the default Azure-provided domain with a domain name of your choosing, thereby enhancing brand consistency and improving user experience. The following sections detail the necessary steps and considerations for successfully configuring custom domains in Azure APIM.
Configuring Custom Domains
The process of setting up a custom domain in Azure APIM involves several key steps. These steps ensure proper domain ownership verification, SSL/TLS certificate management, and routing configuration, leading to a secure and accessible API endpoint.
- Domain Name Acquisition and DNS Configuration: The first step is acquiring a domain name from a domain registrar. Once you have a domain, you must configure the DNS records to point to your APIM instance. This typically involves creating a CNAME record that maps your custom domain (e.g., `api.example.com`) to the default Azure APIM domain (e.g., `your-apim-instance.azure-api.net`).
- SSL/TLS Certificate Management: Secure Sockets Layer/Transport Layer Security (SSL/TLS) certificates are essential for encrypting traffic between clients and your API. You can either import a certificate that you’ve obtained from a Certificate Authority (CA) or use a certificate issued by Azure. The certificate must be in the Personal Information Exchange (.pfx) format if you’re importing it.
- APIM Custom Domain Configuration: Within the Azure portal, navigate to your APIM instance and configure the custom domain settings. You’ll specify the domain name, upload the SSL/TLS certificate (if applicable), and select the appropriate protocol (HTTPS).
- Verification and Propagation: After configuring the custom domain, Azure APIM will verify the domain ownership. This may involve adding a specific TXT record to your DNS configuration. DNS propagation can take some time (typically a few minutes to a few hours) before the changes are fully reflected across the internet.
- Testing and Validation: Once the DNS propagation is complete, you can test your API by making requests to your custom domain. Verify that the requests are successful and that the traffic is being served securely over HTTPS.
Here is an example of how you can configure the custom domain using the Azure CLI:
az apim custom-domain create --resource-group <resource-group-name> --service-name <apim-service-name> --hostname <your-custom-domain> --certificate-file <path-to-certificate.pfx> --certificate-password <certificate-password> --certificate-source <certificate-source>In this example:
- `<resource-group-name>` is the name of the resource group containing your APIM instance.
- `<apim-service-name>` is the name of your APIM instance.
- `<your-custom-domain>` is your custom domain name (e.g., `api.example.com`).
- `<path-to-certificate.pfx>` is the path to your SSL/TLS certificate file.
- `<certificate-password>` is the password for your certificate file.
- `<certificate-source>` specifies the source of the certificate. Valid values include `AzureKeyVault` or `CertificateFile`.
Importing and Managing SSL/TLS Certificates
Managing SSL/TLS certificates is a crucial aspect of securing your custom domain within Azure APIM. Proper certificate management ensures that all traffic to your API is encrypted, protecting sensitive data and maintaining user trust.
Azure APIM offers flexibility in managing SSL/TLS certificates.
- Importing Certificates: You can import certificates from various sources, including local files (.pfx format) or Azure Key Vault. When importing from a local file, you must provide the certificate file and its password. For Key Vault integration, you grant APIM access to your Key Vault instance and select the certificate.
- Certificate Renewal: Certificates have an expiration date, and it’s essential to renew them before they expire. Azure APIM provides options for certificate renewal. If the certificate is managed in Azure Key Vault, you can configure automatic renewal, which simplifies the process. If you upload the certificate manually, you need to re-upload the renewed certificate before the expiration date.
- Certificate Rotation: Regularly rotating certificates is a security best practice. When you rotate a certificate, you replace the existing one with a new certificate. This can be done by importing a new certificate, either from a local file or from Azure Key Vault.
- Monitoring Certificate Expiration: Azure APIM allows you to monitor certificate expiration dates. You should regularly check the expiration dates of your certificates to avoid any service interruptions. The Azure portal and Azure Monitor can be used to track certificate expiration.
Example Scenario: Consider a financial services company, “FinTech Solutions,” deploying an API for processing transactions. They use a custom domain, `api.fintechsolutions.com`, and an SSL/TLS certificate from a trusted Certificate Authority. The company configures Azure APIM to use this certificate. The certificate has a validity period of one year. Three months before the certificate expires, the company receives a renewal certificate from the CA.
The company then imports the new certificate into Azure APIM, updating the custom domain configuration. By proactively managing the certificate, FinTech Solutions ensures that its API remains secure and available, maintaining trust with its users and preventing disruptions to its service.
Managing SSL/TLS Certificates
Securing custom domains with SSL/TLS certificates is crucial for establishing trust, protecting sensitive data, and improving search engine rankings. SSL/TLS (Secure Sockets Layer/Transport Layer Security) encrypts the communication between a user’s browser and the server, ensuring that data transmitted, such as passwords, credit card information, and personal details, remains confidential and protected from eavesdropping. This section Artikels the importance of SSL/TLS certificates, discusses the acquisition and renewal processes from various providers, and contrasts wildcard certificates with individual certificates.
Importance of SSL/TLS Certificates for Securing Custom Domains
SSL/TLS certificates provide several critical benefits for securing custom domains, directly impacting user trust, data security, and website performance.
- Data Encryption: SSL/TLS encrypts the connection between the user’s browser and the server, protecting sensitive information from interception during transmission. This is essential for e-commerce sites, websites handling personal data, and any site where users submit information. The encryption process involves using cryptographic protocols to scramble the data, making it unreadable to unauthorized parties.
- Authentication and Trust: SSL/TLS certificates verify the identity of the website, assuring users that they are communicating with the legitimate server. This is achieved through a process where a Certificate Authority (CA), a trusted third party, validates the domain ownership and issues the certificate. The presence of a valid SSL/TLS certificate is often indicated by a padlock icon in the browser’s address bar and the use of “https” in the URL.
- Improved Search Engine Rankings: Search engines, such as Google, prioritize websites that use HTTPS. Implementing SSL/TLS can positively impact a website’s search engine ranking, leading to increased visibility and organic traffic.
- Compliance with Regulations: Many industries and regulatory bodies mandate the use of SSL/TLS for websites that handle sensitive data, such as healthcare and finance. Compliance ensures adherence to legal and ethical standards.
Obtaining and Renewing SSL/TLS Certificates
Acquiring and renewing SSL/TLS certificates involves a process that varies slightly depending on the provider. However, the core steps generally remain the same.
- Choosing a Certificate Authority (CA): Select a trusted CA, such as Let’s Encrypt (free), DigiCert, Sectigo, or GlobalSign. The choice depends on factors like budget, validation requirements, and features offered.
- Certificate Signing Request (CSR) Generation: Generate a CSR on the server where the certificate will be installed. This request contains information about the domain and organization, which the CA uses to issue the certificate.
- Domain Validation: The CA verifies the domain ownership through methods like email verification, DNS record updates, or file uploads. The validation level influences the certificate type and the level of trust associated with it.
- Certificate Issuance: Once the domain is validated, the CA issues the SSL/TLS certificate.
- Certificate Installation: Install the certificate on the server, configuring the web server (e.g., Apache, Nginx) to use the certificate for secure connections.
- Renewal Process: SSL/TLS certificates have a limited lifespan, typically one year. The renewal process generally involves generating a new CSR, validating the domain, and installing the renewed certificate before the previous one expires. Some providers offer automated renewal options.
Here’s a breakdown of the steps involved with specific providers:
- Let’s Encrypt: Let’s Encrypt offers free, automated SSL/TLS certificates. The process typically involves using a tool like Certbot to automate the CSR generation, domain validation, and certificate installation. Renewal is also automated, simplifying certificate management. For instance, a user can run `certbot –apache` (or `–nginx`) and Certbot will automatically configure the web server to use the certificate.
- DigiCert: DigiCert provides a range of SSL/TLS certificates with varying validation levels (domain validation, organization validation, extended validation). The process involves generating a CSR, submitting it to DigiCert, validating the domain or organization, and installing the issued certificate. DigiCert offers automated certificate management tools and APIs to streamline the renewal process.
- Sectigo: Sectigo (formerly Comodo) offers a wide selection of SSL/TLS certificates. The process mirrors the general steps, including CSR generation, domain validation, and certificate installation. Sectigo often provides features such as multi-domain support and wildcard certificates.
Wildcard Certificates Versus Individual Certificates
The choice between wildcard and individual SSL/TLS certificates depends on the number of subdomains and the specific security requirements.
- Wildcard Certificates: Wildcard certificates secure all subdomains of a domain with a single certificate. For example, a wildcard certificate for
-.example.com would secure www.example.com, blog.example.com, and any other subdomain. Wildcard certificates simplify certificate management, especially for websites with many subdomains. However, if the private key is compromised, all subdomains are at risk. - Individual Certificates: Individual certificates secure only a single domain or subdomain. For example, an individual certificate for www.example.com would only secure www.example.com. Individual certificates offer more granular control and isolation. If one certificate is compromised, it does not affect the security of other subdomains. However, managing multiple individual certificates can be more complex.
Considerations when selecting a certificate type include:
- Number of Subdomains: If there are many subdomains, a wildcard certificate might be more efficient.
- Security Requirements: For high-security environments, individual certificates may provide better isolation and reduce the impact of a potential compromise.
- Budget: Wildcard certificates are generally more expensive than individual certificates.
- Management Overhead: Individual certificates require more management effort, including tracking expiration dates and installing certificates on each subdomain.
For example, a large e-commerce platform might use a wildcard certificate for its main domain and individual certificates for highly sensitive areas, such as the checkout process. A small blog with a few subdomains might opt for a wildcard certificate to simplify management.
Troubleshooting Common Issues
Setting up custom domains for serverless APIs, while offering significant benefits, can sometimes present challenges. Developers frequently encounter a range of issues, from DNS propagation delays to SSL certificate validation problems. A systematic approach to troubleshooting is essential for identifying and resolving these difficulties effectively. Understanding the underlying causes and employing diagnostic tools is crucial for maintaining a functional and accessible API.
Identifying Common Issues Developers Encounter
Several recurring problems plague developers during the implementation of custom domains. These issues often stem from misconfigurations, misunderstanding of DNS propagation, or problems related to SSL/TLS certificates. A proactive approach, involving careful planning and diligent verification, can mitigate many of these common pitfalls.
- DNS Propagation Delays: One of the most frequent issues is the time it takes for DNS changes to propagate across the internet. This delay can result in users being unable to access the API via the custom domain immediately after configuration.
- SSL/TLS Certificate Issues: Problems with SSL/TLS certificates, such as incorrect configuration, certificate expiration, or domain validation failures, can lead to browser errors and prevent secure connections.
- Incorrect DNS Records: Errors in DNS record configuration, such as typos in the record values or incorrect record types (e.g., using an A record when a CNAME is required), can prevent the domain from resolving to the API endpoint.
- API Gateway Configuration Errors: Incorrectly configuring the API Gateway, including issues with the base path mapping or regional settings, can also prevent the custom domain from functioning correctly.
- Domain Registrar and Provider Limitations: Some domain registrars or cloud providers may have limitations or specific requirements that can complicate the setup process, leading to unexpected errors.
- Certificate Authority (CA) Issues: Problems with the Certificate Authority used for SSL/TLS certificate issuance, such as revocation or misconfiguration, can result in connection errors.
Diagnosing and Resolving DNS Propagation Problems
DNS propagation delays are a common source of frustration. Understanding the mechanisms behind DNS and employing effective diagnostic tools is key to resolving these issues. The time required for DNS changes to propagate depends on various factors, including the Time-To-Live (TTL) setting of the DNS records and the caching behavior of DNS servers.To diagnose and resolve DNS propagation problems, consider the following steps:
- Verify DNS Record Configuration: Double-check the DNS records configured with your domain registrar. Ensure the records are correctly set up according to the instructions provided by your API provider.
- Use DNS Lookup Tools: Employ online DNS lookup tools (e.g., DNS Checker, whatsmydns.net) to check the DNS record propagation across different DNS servers globally. These tools can provide insights into whether the changes have propagated everywhere or if there are regional delays.
- Check TTL Settings: Examine the TTL values of your DNS records. A lower TTL value (e.g., 300 seconds) will speed up propagation, but it also increases the frequency of DNS queries, potentially impacting performance. A higher TTL (e.g., 3600 seconds or more) results in slower propagation but can reduce DNS query load.
- Clear DNS Cache: Clear your local DNS cache and the browser cache to ensure you are not viewing outdated information. This is especially important when testing after making DNS changes.
- Contact Your Domain Registrar or Provider: If propagation is consistently slow or if you encounter persistent problems, contact your domain registrar or API provider for assistance. They may have insights into potential issues specific to your setup.
Common Error Messages and Solutions
Error messages provide valuable clues for troubleshooting. Understanding the common error messages encountered during custom domain setup and knowing the corresponding solutions can significantly speed up the resolution process.
| Error Message | Possible Cause | Solution | Additional Notes |
|---|---|---|---|
| “The certificate is not valid for the domain.” | Certificate does not cover the custom domain, or certificate is not yet fully validated. | Ensure the certificate covers the correct domain and any subdomains. Re-request or renew the certificate. Verify the domain’s ownership. | Check the Common Name (CN) or Subject Alternative Names (SANs) on the certificate. |
| “DNS resolution failed for the domain.” | Incorrect DNS record configuration or DNS propagation delay. | Verify DNS records (A, CNAME, etc.) at your registrar. Check for typos. Wait for DNS propagation. Use DNS lookup tools to verify propagation. | Consider reducing the TTL on your DNS records to expedite propagation, although this may increase DNS query load. |
| “Invalid or missing base path mapping.” | Incorrect base path mapping in API Gateway or Cloud Run configuration. | Verify that the base path mapping is correctly configured to point to the correct API stage or service. Review the API Gateway console or cloud provider’s configuration. | Ensure the base path mapping aligns with your intended URL structure (e.g., /v1/api). |
| “Connection timed out” or “503 Service Unavailable” | Server-side issues, such as backend service downtime or misconfiguration, or DNS propagation issues. | Check the status of your backend service. Verify that your API is deployed and accessible. Investigate logs for errors. Check DNS settings. | Use monitoring tools to track your API’s health and performance. Implement proper error handling and logging. |
Automating Custom Domain Setup
Automating the custom domain setup process is crucial for achieving consistent, repeatable, and efficient deployments of serverless APIs. Manual configuration is prone to errors, time-consuming, and difficult to scale. Infrastructure as Code (IaC) tools address these challenges by allowing the declarative definition and automated provisioning of all infrastructure components, including custom domains, DNS records, and SSL/TLS certificates. This approach streamlines the deployment process, improves infrastructure reliability, and promotes collaboration.
Methods for Automating Custom Domain Setup Using IaC Tools
IaC tools offer several methods for automating custom domain setup, varying in their approach and capabilities. Understanding these methods is essential for choosing the most appropriate solution for a specific project.
- CloudFormation (AWS): AWS CloudFormation allows you to define your infrastructure as code using YAML or JSON templates. These templates describe all the resources required for your custom domain, including the API Gateway domain name, DNS records in Route 53, and certificate management via ACM (AWS Certificate Manager). CloudFormation provides robust support for dependency management and rollbacks, ensuring a reliable deployment process.
- Terraform (Multi-Cloud): Terraform is a popular open-source IaC tool that supports multiple cloud providers, including AWS, Google Cloud, and Azure. It uses a declarative configuration language (HCL) to define infrastructure resources. Terraform can manage the entire custom domain setup, from creating API Gateway domain names and setting up DNS records to provisioning SSL/TLS certificates from various providers. Its state management capabilities allow for efficient updates and collaboration.
- Azure Resource Manager (ARM) Templates (Azure): ARM templates are JSON files used to define and deploy Azure resources. They can be used to configure custom domains for Azure API Management, including setting up the domain name, managing certificates, and configuring DNS records. ARM templates are integrated with Azure’s deployment pipelines, making them suitable for automated deployments within the Azure ecosystem.
- Google Cloud Deployment Manager (Google Cloud): Deployment Manager allows you to define and deploy Google Cloud resources using YAML or Python templates. It supports configuring custom domains for Google Cloud Run and managing SSL/TLS certificates through Google Cloud’s SSL certificate management service. Deployment Manager offers a declarative approach to infrastructure management, enabling consistent and repeatable deployments.
Code Examples Demonstrating IaC Tool Usage for Custom Domain Configuration
The following code examples illustrate how to use IaC tools to configure custom domains. These examples provide practical demonstrations of the concepts discussed above.
Terraform Example (AWS):
This example demonstrates setting up a custom domain with API Gateway using Terraform. It includes creating an API Gateway domain name, importing a certificate, and configuring a Route 53 DNS record.
resource "aws_api_gateway_domain_name" "example" domain_name = "api.example.com" certificate_arn = aws_acm_certificate.example.arn endpoint_configuration types = ["REGIONAL"] resource "aws_route53_record" "example" zone_id = data.aws_route53_zone.selected.id name = "api.example.com" type = "A" alias name = aws_api_gateway_domain_name.example.cloudfront_domain_name zone_id = aws_api_gateway_domain_name.example.cloudfront_zone_id evaluate_target_health = false data "aws_route53_zone" "selected" name = "example.com." private_zone = false resource "aws_acm_certificate" "example" domain_name = "api.example.com" validation_method = "DNS" lifecycle create_before_destroy = true
CloudFormation Example (AWS):
This example demonstrates setting up a custom domain using AWS CloudFormation. This snippet shows how to define the API Gateway domain name and the associated Route 53 DNS record.
AWSTemplateFormatVersion: '2010-09-09' Description: "Creates an API Gateway custom domain and DNS records" Resources: CustomDomain: Type: AWS::ApiGateway::DomainName Properties: DomainName: api.example.com RegionalCertificateArn: !Ref CertificateArn EndpointConfiguration: Types: -REGIONAL ApiGatewayRecord: Type: AWS::Route53::RecordSet Properties: HostedZoneName: example.com.Name: api.example.com Type: A AliasTarget: DNSName: !GetAtt CustomDomain.DistributionDomainName HostedZoneId: !GetAtt CustomDomain.DistributionHostedZoneId
ARM Template Example (Azure):
This example showcases the definition of a custom domain for Azure API Management. It includes the configuration of the custom domain itself and the certificate associated with it.
"$schema": "https://schema.management.azure.com/schemas/2019-04-01/deploymentTemplate.json#", "contentVersion": "1.0.0.0", "parameters": "apiManagementServiceName": "type": "string", "metadata": "description": "The name of the API Management service." , "customDomainHostname": "type": "string", "metadata": "description": "The custom domain hostname (e.g., api.example.com)." , "certificateName": "type": "string", "metadata": "description": "The name of the certificate resource." , "certificatePassword": "type": "securestring", "metadata": "description": "The password for the certificate." , "certificateKeyVaultId": "type": "string", "metadata": "description": "The Key Vault resource ID where the certificate is stored." , "certificateSecretName": "type": "string", "metadata": "description": "The secret name in Key Vault that contains the certificate." , "resources": [ "type": "Microsoft.ApiManagement/service/customDomains", "apiVersion": "2023-05-01-preview", "name": "[concat(parameters('apiManagementServiceName'), '/default')]", "properties": "hostname": "[parameters('customDomainHostname')]", "certificateSource": "type": "KeyVault", "keyVaultId": "[parameters('certificateKeyVaultId')]", "secretName": "[parameters('certificateSecretName')]", "identityClientId": "[parameters('identityClientId')]" ] Integrating Custom Domain Setup into a CI/CD Pipeline
Integrating custom domain setup into a CI/CD pipeline ensures that domain configuration is automatically updated during deployments, reducing manual intervention and ensuring consistency.
The specific implementation depends on the IaC tool and CI/CD platform used.
Steps for Integration:
- Define IaC Configuration: Define the custom domain configuration using your chosen IaC tool (e.g., Terraform, CloudFormation, ARM templates). This includes the API Gateway domain name, DNS records, and certificate management.
- Version Control: Store the IaC configuration files in a version control system (e.g., Git). This allows for tracking changes, collaboration, and rollbacks.
- CI/CD Pipeline Configuration: Configure your CI/CD pipeline to automatically apply the IaC configuration during deployments. This typically involves the following steps:
- Trigger: The pipeline is triggered by code changes in the repository.
- Authentication: The pipeline authenticates with the cloud provider using appropriate credentials (e.g., IAM roles, service accounts).
- IaC Execution: The pipeline executes the IaC commands (e.g., `terraform apply`, `aws cloudformation deploy`, `az deployment create`) to provision or update the custom domain infrastructure.
- Testing: (Optional) The pipeline performs tests to verify that the custom domain is correctly configured and that the API is accessible through the custom domain.
- Notification: The pipeline sends notifications (e.g., email, Slack) to indicate the success or failure of the deployment.
- Example (Terraform and GitHub Actions):
Consider a GitHub Actions workflow for deploying a custom domain with Terraform. The workflow would:
- Checkout the code repository.
- Configure the cloud provider credentials.
- Initialize Terraform.
- Plan the Terraform changes.
- Apply the Terraform changes (if the plan indicates changes).
By integrating custom domain setup into a CI/CD pipeline, organizations can automate the entire deployment process, reduce errors, and accelerate the delivery of serverless APIs. This automation enables faster iteration cycles, improves developer productivity, and enhances the overall reliability of the API infrastructure.
Last Word
In conclusion, the successful implementation of custom domains for serverless APIs hinges on a combination of careful planning, precise execution, and a thorough understanding of the underlying technologies. From selecting the right domain name to automating the deployment process, this discussion has provided a comprehensive overview of the critical steps involved. By mastering these techniques, developers can unlock the full potential of serverless architectures, creating robust, scalable, and user-friendly APIs that meet the demands of modern applications.
The ability to manage custom domains is not merely a technical skill, but a fundamental requirement for building a professional and reliable online presence.
FAQ
What are the security implications of using a custom domain for my serverless API?
Using a custom domain, especially with an SSL/TLS certificate, enhances security by encrypting data in transit, protecting against man-in-the-middle attacks, and establishing trust with users. It also allows for the use of security features like Content Security Policy (CSP) and other HTTP security headers, improving overall API security posture.
How does DNS propagation affect the setup of a custom domain?
DNS propagation refers to the time it takes for DNS changes to be distributed across the internet. This can take several hours, or sometimes even up to 48 hours. During this period, your custom domain may not resolve to your serverless API correctly. It’s crucial to factor in propagation time when setting up a custom domain and to verify the DNS settings after sufficient time has passed.
What are the costs associated with using custom domains for serverless APIs?
Costs typically include domain registration fees, SSL/TLS certificate fees (if using a paid provider), and potentially any costs associated with the specific serverless platform you are using (e.g., AWS API Gateway custom domain setup costs, or Google Cloud Run costs for a custom domain). The specific costs will vary depending on the providers and the features used.
Can I use a subdomain (e.g., api.example.com) instead of the root domain (e.g., example.com)?
Yes, you can absolutely use subdomains for your serverless APIs. This is a common practice for organizing your API endpoints. The setup process is similar to using a root domain, but you’ll configure the appropriate DNS records (usually a CNAME record) to point the subdomain to your serverless API’s endpoint.